First impressions are important.
Think about when you land on a website, what’s the first thing you do? I’m willing to bet you scroll around to take it all in visually.
Visual is the key word here, and it’s why images are so important.
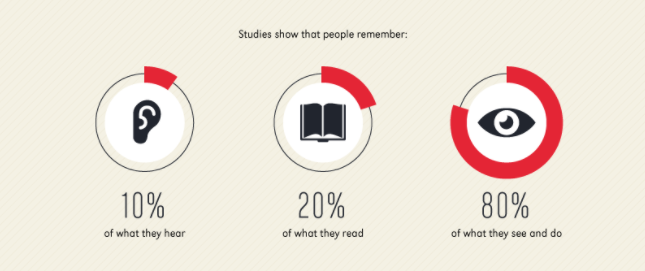
People remember 80% of what they see and only 20% of the stuff they read – so you can see just how important they are.
Oh, and did we mention that blog posts with images get 94% more views than text-based ones?
Basically, including images on your site is a non-negotiable.
Most businesses take this on board and fill their sites with stock images, as this is the go-to method to get high-quality images without working too hard. Stock images look professional and are easy to get hold of once you know where to find them and how to do a successful search.
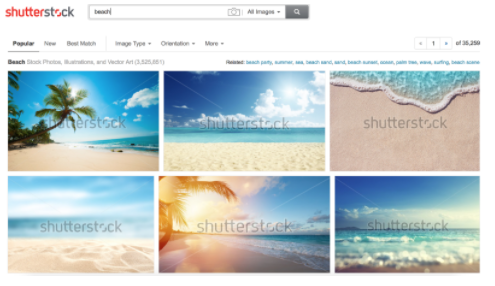
But stock photography isn’t the only way. In fact, in can be expensive and it doesn’t necessarily represent your brand in the right way.
So let’s take a look at the other options you have for decorating your site with pretty pictures.
1. User Generated Content
Why not put image creation into the hands of your customers and audience? That’s exactly what User Generated Content means. Instead of sourcing images from here, there, and everywhere, or taking your own haphazard photos, you can promote the fine works of your people instead.
Not only does using UGC mean you have access to content you otherwise wouldn’t have access to, it also boosts engagement around your brand and converts more sales – a massive 84% of millennials claim UGC on a website influences their purchasing decision.
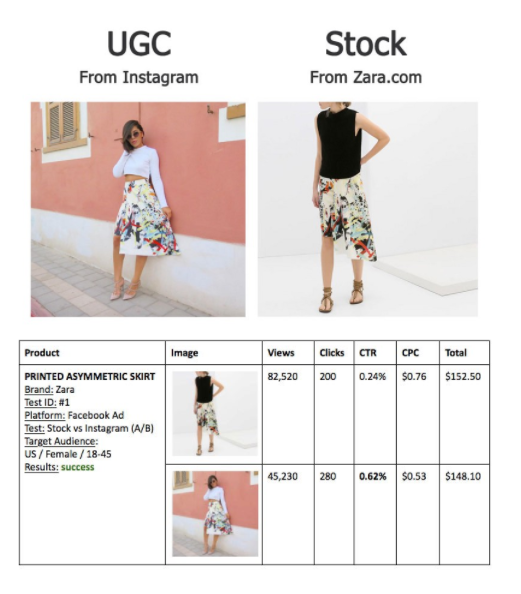
Bllush ran an experiment to see what kind of images perform better in ads – user-generated ones or stock images. The results showed that nine times out of ten, the user-generated image got more views and clickthroughs.
There are a few ways you can implement UGC on your site instead of images:
- Ask your audience for a specific type of image via a social media hashtag. For example, get them to share pictures of them using your product.
- Hunt down consumer-created images on Instagram and Facebook.
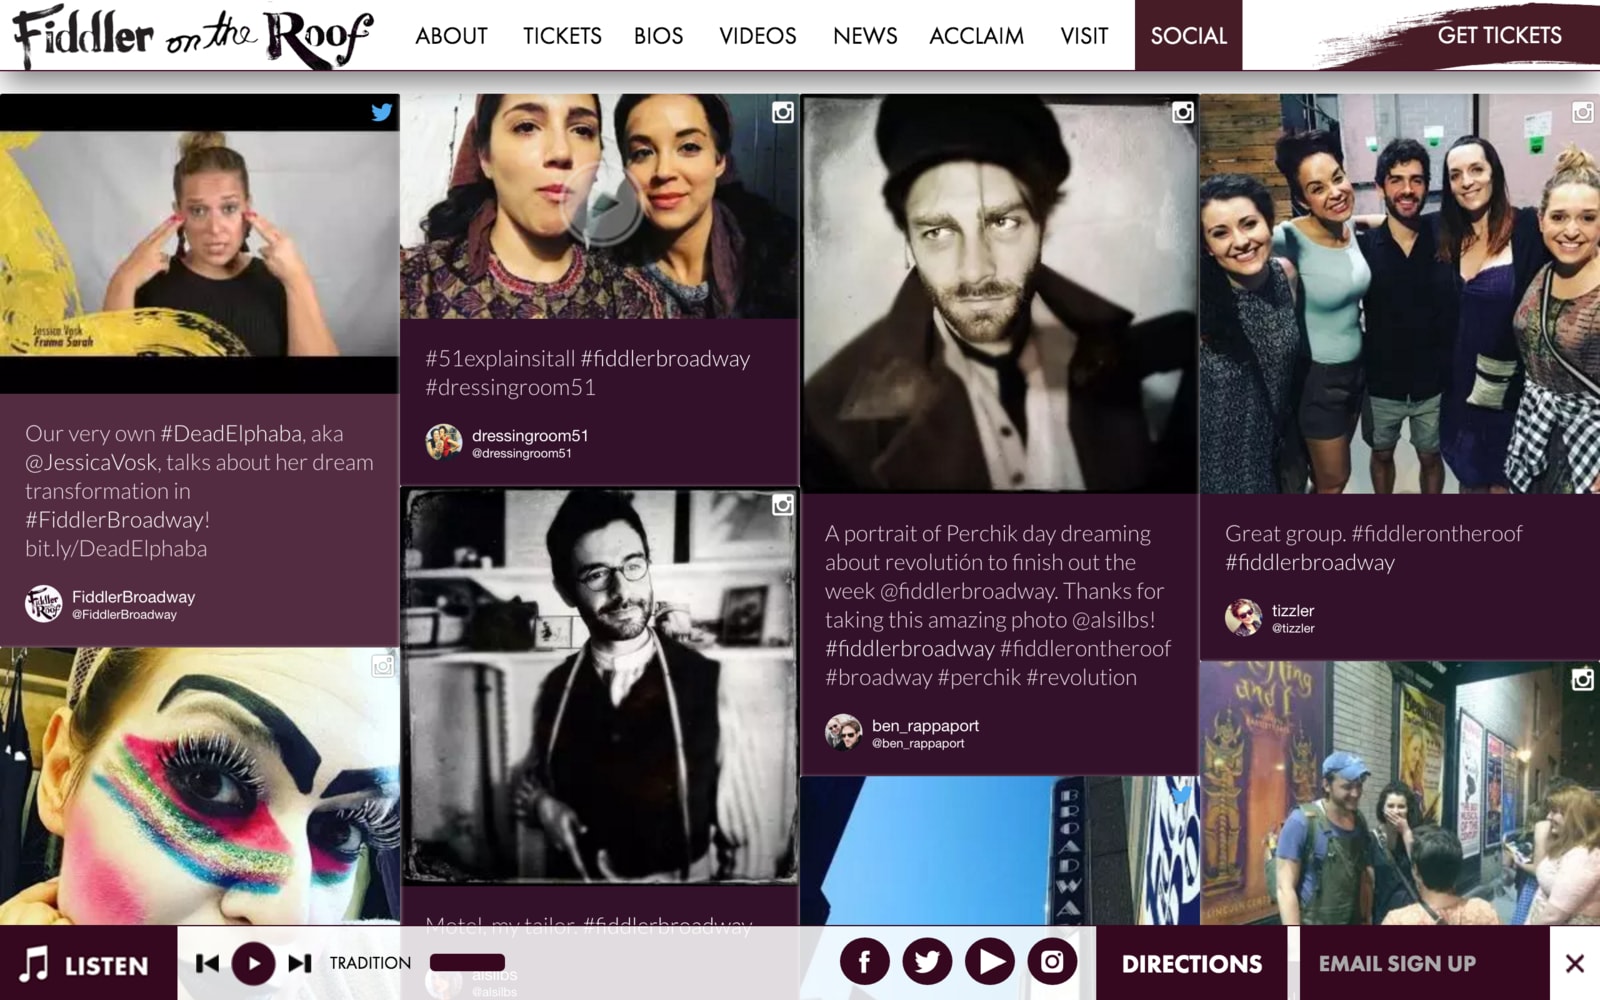
- Implement a social media aggregator like TINT that pulls in images from your audience in real-time.
2.Use Videos
You only have to look at the massive reception the new live video trend has garnered to know that people LOVE videos. Not only are they more engaging than stand-alone images, but they let you present information in a different format to reach a whole new audience.
A study by Diode Digital found that 60% of site visitors will watch a video before they read the text, so inserting a simple video in your post could make the world of difference.
We embedded a video in this piece on the TINT blog.
You might be thinking that video creation is a long-winded affair, but it doesn’t have to be. As well as creating short videos with, you got it, your smartphone, you can always simply embed a relevant video from YouTube or Vimeo onto your site.
3. Use Infographics
Stats make the world go ‘round. Or at the very least, they back up your claims and boost your authority. Cue the visual representation of stats, the Infographic, a.k.a. “The visualization of data or ideas that tries to convey complex information to an audience in a manner that can be quickly consumed and easily understood.”
Thanks Mark Smiciklas for that concise description.
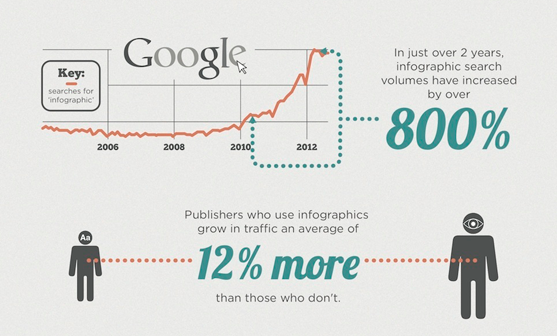
Not only have searches for infographics increased by a whopping 800% in two years (showing just how much consumers LOVE this type of visual), they also help you increase traffic to your site. And, according to research, brands that publish infographics grow on average 12% more than those that don’t.
There are plenty of tools out there that let you design your own infographic, or you can hire a designer to create one for you.
4. Creative Commons Images
Ever wonder what happens to all the photos keen photographers post online? Well, some of them let you use them but – wait for it – there are conditions involved.
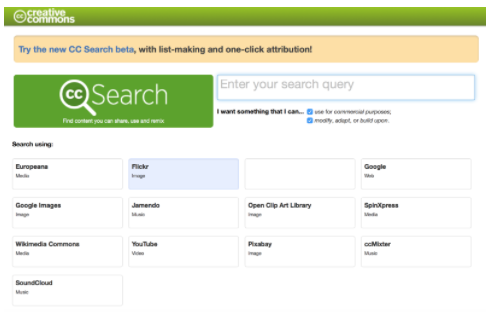
Creative Commons images are visuals you can use on your own site as long as you cite and credit the photographer. This gives you access to millions of images that you otherwise wouldn’t be able to use.
You can search for relevant Creative Commons snaps on Flickr, Wikimedia, and Google Images.
Find Creative Commons images here.
5. DIY Photography
Everyone has a smartphone these days, and one of the key features of a smartphone is a good camera. Now, you might not be the next David Bailey, but if you’ve got a decent enough eye you can take some pretty good pictures of your own.
This puts the power in your hands. You can alter the color, props, lighting and everything in between to make sure your images are on-brand and follow your vision.
And remember, your images don’t have to be literal representations. Abstract images work just as well in most cases.
To kick things off, start collecting images while you’re out and about. You can dip into this portfolio of images whenever you need a visual representation or, if there’s something specific you want to convey, you can set up your own little shoot for it.
6. Use an Illustrator
The thing about stock images is they start to all look the same after a while. Tons of other brands might be using the same snaps as you which kinda makes you blend into the noise. Not what you want.
However, if you hire an illustrator to create quirky and stylized images that align with your brand, you’re pushing yourself above those same-y companies that all use same-y stock images.

Silverback uses illustrations on its site instead of photography.
Now, obviously, illustration is a refined skill that not many people possess, so you could always outsource image creation to a student illustrator to save a bit of cash.
7. Free Image Libraries
If you’re tired of paying through the nose for stock images, try one of the many free image libraries instead like:
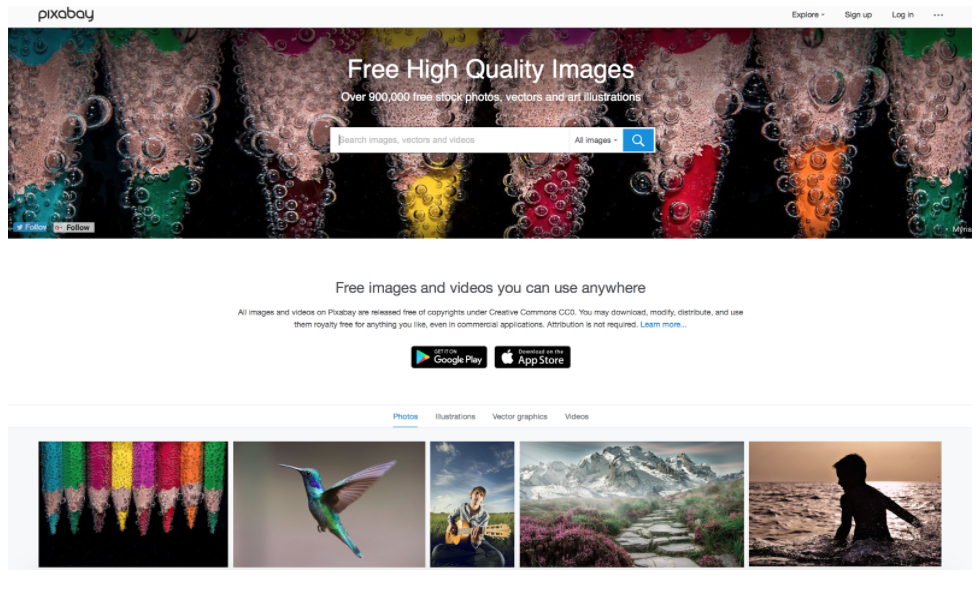
Sure, there might not be as much choice as the paid-for options, but you’ll still have ample collections to sift through. These sites let you use the images for free without having to credit the photographer – just be aware that you might get sucked into a black hole of searching for the perfect image.
8. Draw It Yourself
Again, the ability to draw well isn’t a skill that everyone possesses. But, if you’re one of the lucky few who can wield a pencil successfully, you can always create your own images.
This means you have complete control over the style and content of your imagery, and it means you can align each image with your brand and give it a little injection of personality.
What’s more, people are more likely to share an image they’ve never seen before on sites like Pinterest, so creating unique visuals works in your favor for virality.
To get a more professional look, scan your finished image into a tool like Photoshop to tidy it up before you let it loose on your website.
9. Illustrate Your Stats (or Use Graphs)
As I mentioned earlier, stats make the world go round.
If your post is full of juicy facts and figures, you can easily make these visual. It’s worth bearing in mind that, as humans, we process images 60,000x quicker than text, so turning important stats into a visual format helps your audience soak them in.

You can also turn research and findings into visual graphs so your audience have another way of taking in the information.
10. Take Screenshots
Again, if your piece is highly technical or you’re sharing a tutorial, you can include screenshots to better illustrate your point.
It’s been proven that screenshots increase engagement rates, especially when they’re shared on social media. In this one case, the simple inclusion of a screenshot that showed that showed some stats got a 341% engagement rate on Facebook.
11.Create a Meme
Memes are everywhere at the moment, and there’s a reason for that. They’re amusing, on trend, and let brands customize their imagery to reflect their vision.
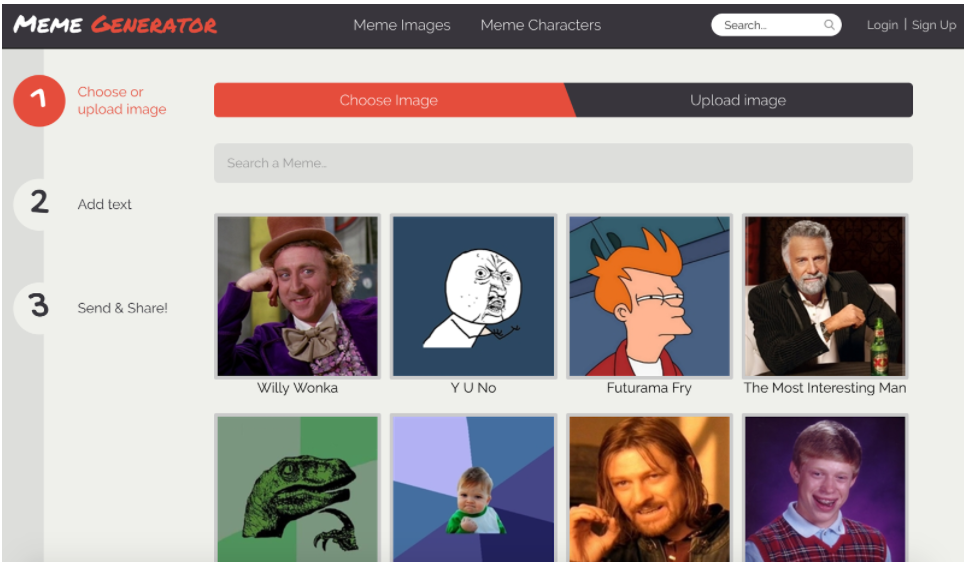
You can start your meme creation with a stock image, a photo from a free image library, or an image you’ve created yourself and upload it to a meme creation tool like MemeGenerator or Imgur (which has its own in-built meme generation feature).
And voila! You’ve created your own meme that’s unique to your brand.
12. Use Skitch
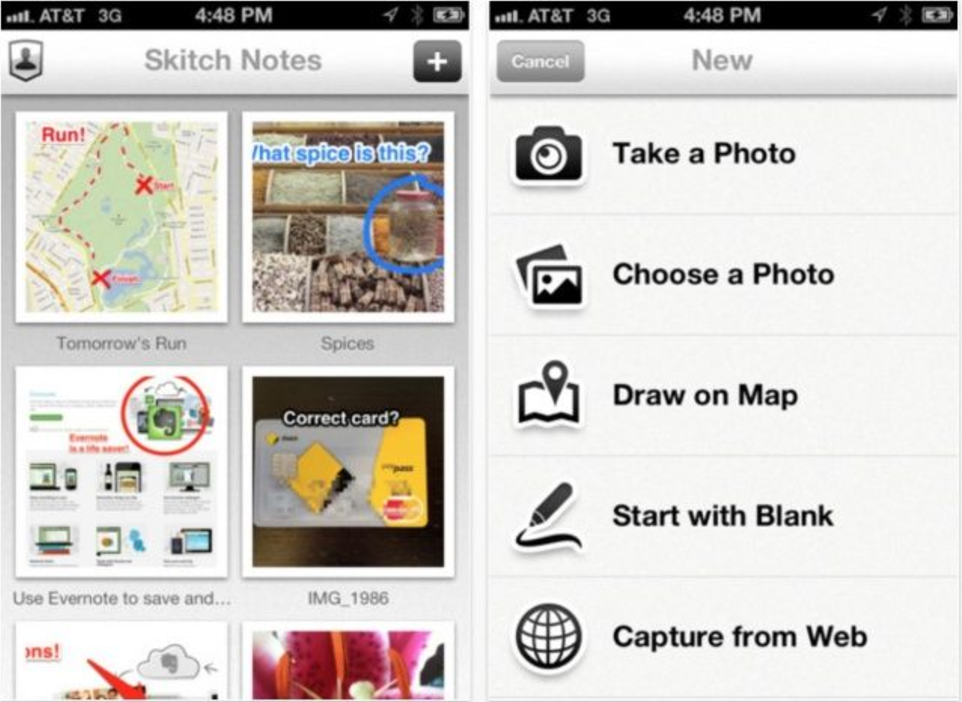
Evernote’s Skitch feature lets you add annotations, shapes, and sketches to images and drawings to personalize your graphics or to further highlight key points.
You can add arrows to draw out the most important information, add sketches and stickers over the top of other images, and annotate certain parts of your photos to create more of a connection with your audience.
Imagery is so important on your website. When you know that 65% of the population are visual learners and that we process images lightyears faster than text, it seems like the sensible option to incorporate them in anyway you can.
Before, you might have thought that stock photos were the only way forward but, as we’ve lovingly detailed here for you, there are so many more ways you can boost engagement on your site with images.

